Pass dynamic data to Google Sheets using Google Tag Manager

Let’s say you want to use Google Sheets as a simple database to store your incoming inquiries with all details people fill in the form submission. You can’t use Google Analytics for it as it doesn’t allow personal identifiable information like email address to be stored. That’s why we’ll pass the data through Google App scripts to a Google Sheet, for free.

You can do the same with Zapier, where the coding part is hidden behind their beautiful interface, but their free version supports up to 100 tasks / month.

Let’s start by creating a simple sheet – my contact form has several fields I want to capture, like name, email, and subject. And in addition I’ll record a timestamp in GMT. So I’ll have these 4 as column titles:

table columns

Now we need the app script to do the magic. We go to Tools – Script Editor… and a new tab will open to write your script. We’ll remove the placeholder with the code below, courtesy of Martin Hawskey. It’s slightly updated, as his original version wasn’t working for me.

// Usage
// 1. Enter sheet name where data is to be written below
// 1. Enter sheet name and key where data is to be written below
var SHEET_NAME = "Sheet1";
var SHEET_KEY = "insert-sheet-ID-here";

// 2. Run > setup
//
// 3. Publish > Deploy as web app
// - enter Project Version name and click 'Save New Version'
// - set security level and enable service (most likely execute as 'me' and access 'anyone, even anonymously)
//
// 4. Copy the 'Current web app URL' and post this in your form/script action
//
// 5. Insert column names on your destination sheet matching the parameter names of the data you are passing in (exactly matching case)

var SCRIPT_PROP = PropertiesService.getScriptProperties(); // new property service

// If you don't want to expose either GET or POST methods you can comment out the appropriate function
function doGet(e){
return handleResponse(e);
}

function doPost(e){
return handleResponse(e);
}

function handleResponse(e) {
var lock = LockService.getPublicLock();
lock.waitLock(30000); // wait 30 seconds before conceding defeat.

try {
// next set where we write the data - you could write to multiple/alternate destinations
var doc = SpreadsheetApp.openById(SHEET_KEY);
var sheet = doc.getSheetByName(SHEET_NAME);

// we'll assume header is in row 1 but you can override with header_row in GET/POST data
var headRow = e.parameter.header_row || 1;
var headers = sheet.getRange(1, 1, 1, sheet.getLastColumn()).getValues()[0];
var nextRow = sheet.getLastRow()+1; // get next row
var row = [];
// loop through the header columns
for (i in headers){
if (headers[i] == "Timestamp"){ // special case if you include a 'Timestamp' column
row.push(new Date());
} else { // else use header name to get data
row.push(e.parameter[headers[i]]);
}
}
// more efficient to set values as [][] array than individually
sheet.getRange(nextRow, 1, 1, row.length).setValues([row]);
// return json success results
return ContentService
.createTextOutput(JSON.stringify({"result":"success", "row": nextRow}))
.setMimeType(ContentService.MimeType.JSON);
} catch(e){
// if error return this
return ContentService
.createTextOutput(JSON.stringify({"result":"error", "error": e}))
.setMimeType(ContentService.MimeType.JSON);
} finally { //release lock
lock.releaseLock();
}
}

We need to specify our Sheet so we copy the part between /d/ and /edit and paste it in the insert-sheet-ID-here quotes on line 5.

Google-sheets-ID

We can name our project however we like and save our script. As a next step, we select Publish – Deploy as web app, change the Who has access to the app setting to Anyone, even anonymous, and hit Deploy button.

deploy-web-app

The first time it will ask for authorization, click Continue and Allow and you’ll be presented with the web app URL:
web-app-URL

Copy it as we’ll need it to complete our setup.

Now, let’s create the variables in GTM that will pass the data we want. In my case I have 3 text fields and I’ll use their class names coming from Contact Form 7 WordPress plugin.

This is what my button looks like:

<input class="wpcf7-form-control wpcf7-text wpcf7-validates-as-required" name="your-name" size="40" type="text" value="" />

Name custom JS variable:

function() {
var inputField = document.getElementsByClassName("wpcf7-form-control wpcf7-text wpcf7-validates-as-required")[0];
return inputField.value || "";
}

Email custom JS variable:

function() {
var inputField = document.getElementsByClassName("wpcf7-form-control wpcf7-text wpcf7-email wpcf7-validates-as-required wpcf7-validates-as-email")[0];
return inputField.value || "";
}

Subject custom JS variable:

function() {
var inputField = document.getElementsByClassName("wpcf7-form-control wpcf7-text")[0];
return inputField.value || "";
}

You can quickly test them in the Console of Chrome Developer tools: custom-JS-variables-test

Timestamp custom JS variable:

function(){
var today = new Date();
var str = today.toUTCString();
return str;
}

Now we have all our variables and we’ll contruct our GET call:

https://script.google.com/macros/s/<replace with your web app URL>/exec?Name={{Name}}&Email={{Email}}&Subject={{Subject}}&Date={{Timestamp}}

Be careful to use exactly the same words as it’s case sensitive.

You can test how this works if you open the link in a new tab – you should get a success result {“result”:”success”,”row”:2} and if you check your sheet, it’s automatically populated:

Google-Sheet-populatedWe can remove the dummy data later.

Now let’s create the tag that will fire this in GTM, I’ll use a Custom Image tag. Give it a name, paste your string in the Image URL field and select your trigger (the form submission in my case):

GTM-tag
Create the tag, enter Preview and Debug mode and let’s see what happens. Go to your form, make a submission and we’ll see our tag being fired:

GTM-debug-mode-test

Also, when we check our sheet, it’s already there: Google-Sheets-final

Like magic! 🙂

How to troubleshoot click tracking with Google Tag Manager

It’s easy to make a mistake when you setup your click tracking in Google Tag Manager or you just may not know how to define the click triggers.

Here’s a way to understand how GTM sees your click elements and end up with a properly working click tracking.

Let’s say we have a button that we want to add click tracking to.

First, go to Variables page in GTM and make sure all Click variables are enabled: Click Element, Click Classes, Click ID, Click Target, Click URL, Click Text.

GTM-clicks-variables

Next we want to create a simple click event for all clicks.

1. Go to Tags – New, give it a name, and select Google Analytics and Universal Analytics as product and tag type.
2. Enter your GA tracking ID or use a variable if you have one. Select Event from the track type drop-down and give it some generic category and action values.
3. Now for your trigger in the Fire On section, select Click, give the trigger a name and select All Elements for All clicks.

GTM-click-trigger

4. Save your tag.

GTM-generic-click

Enter Debug mode and refresh the page of your website which has the button you want to track clicks on. Let’s say I want to track the clicks on the comments balloon icon on the blog. Click the button while pressing Ctrl key so it opens a new tab, and let’s see what the Debug console looks like:

GTM-debug-mode

So we have our click tag firing. Now click gtm.click in the Summary pane on the left and select Variables at the top. Here we can see what data layer variables GTM sees for this element so we can use them to improve our trigger to track clicks on this button only, and not all clicks:

GTM-debug-variables

You can use either the click classes or click ID if these are available and unique, or for an element like click URL we may select condition like contains “respond”.

That’s all! A quick way to properly set your click tracking.

P.S. Got a Google Analytics question? Send it to me and I’ll try to answer it on the blog.

5 Google Analytics posts you don’t want to miss in August

Here’s again the last post of the month saved for the top 5 interesting Google Analytics related resources I found on other sites. Here are the five for August – you may want to bookmark those as they can be very useful:

Stop Ghost Spam in Google Analytics with One Filter

This post covers the types of spam and some common mistakes and offers a solution for the referral spam with a simple include filter of your hostname / related hostnames.

Google Search Console vs. Google Analytics – Why Clicks Don’t Match Sessions

The LunaMetrics guys explain why the count of clicks in the Search Analytics report in Google Search Console (formerly Google Webmaster Tools) doesn’t match the count of sessions in Google Analytics for the source Google and medium organic. They explain why they’re different, how both are measured and more.

Form Field Timing With Google Tag Manager

Simo Ahava continues his post on form abandonment tracking with an example how to track the time users spend on your form fields, using the User Timings hit type and sending the data for just one form.

User-ID: Measuring Real Users Instead of Devices

LunaMetrics post again, explaining how to identify your visitors with unique User-IDs, configure GTM to collect the User-ID and assign it to users, configure the User ID settings in Google Analytics and configure a User-ID View.

Understanding Tag Sequencing In Google Tag Manager

Another post by Simo Ahava about the recent update to Google Tag Manager, called Tag sequencing. It facilitates the sequential firing of tags and you can specify a setup and a cleanup for each tag in your container.

P.S. Got a Google Analytics question? Send it to me and I’ll try to answer it on the blog.

Track selected drop-down in form submission with Google Tag Manager

On a recent project I wanted to capture what visitors selected in a drop-down field when submitting a form. I tried using the JS variable suggested by Simo Ahava in this must-read guide to form tracking:

function() {
var selectId = document.getElementById("YOUR_SELECT_ID_HERE");
try {
var options = document.getElementById(selectId).options;
for (var i = 0;i &lt; options.length;i++){
if(options[i].selected) {
return options[i].value;
}
}
} catch(e) {}
return "";
}

In my form however, the select field doesn’t get a select attribute, so nothing happened.

Here’s how to do it in another way:

1. Create a form tracking tag (if you don’t already have one) and go to the page with your form. In my example here I want to capture what department users select.

2. Hit F12 to open Developer Tools in Chrome. Fill in your form and submit it so its data populates the GTM data layer.

3. In Console tab type dataLayer and hit Enter. You’ll see multiple Objects – 3 main ones for gtm.js, gtm.dom and gtm.load and probably some more depending how many tags you have eligible to fire on this page. We’re looking for the object on event gtm.formSubmit:

object-form

4. Click the triangle next to gtm.element for this object to see what it consists of. We’re interested in the select field and its index which is 5 in our case:

gtm-element

5. Go to Google Tag Manager – Variables and click New. I’m calling mine Department and its type will be Data Layer Variable. In the Configure Variable section type gtm.element.5.value for name which means we’ll get the value of the field in index 5 as we saw above:

variable

6. Save the variable and update your Form tag:

updated-form-tag

Now we should be ready to test it. Click Publish – Preview to enter debug mode, refresh your page with the form and make a test submission:

selected-value

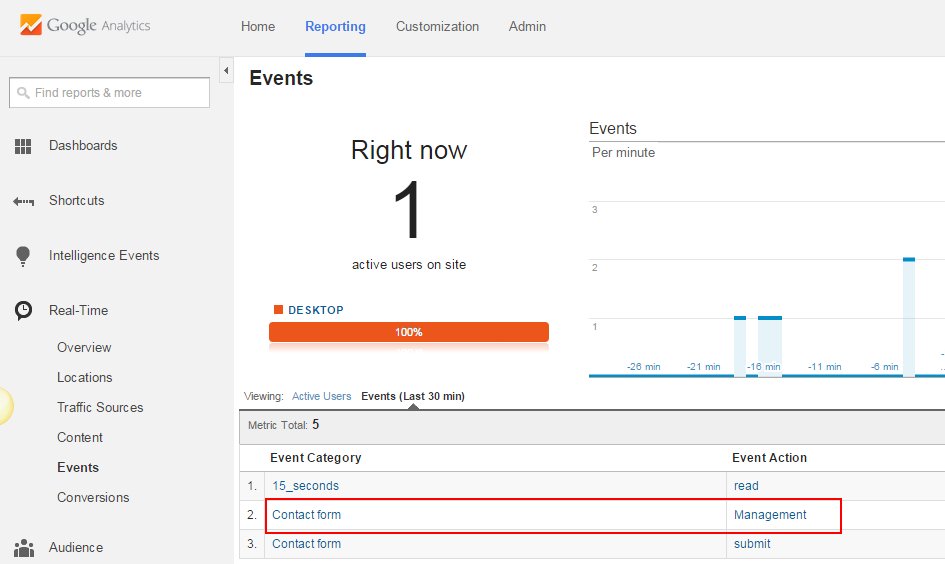
We can see our variable is populating correctly. You can also check it in GA Real-Time Events report:

ga-check

Is this working for you? Leave a comment with your questions.

P.S. Got a Google Analytics question? Send it to me and I’ll try to answer it on the blog.

Track WordPress Contact Form 7 with Google Tag Manager

Here’s a quick tip to track form submissions in Contact Form 7 plugin with Google Tag Manager.

Note: If you’re using DuracellTomi plugin for GTM, here’s a great article to follow.

If you added GTM directly to your WordPress template and tried to track form submissions with the default settings, you may have noticed that there’s no gtm.formSubmit event in debug mode.

It’s quite easy to fix this. Let’s start with the trigger:

1. Name your trigger.
2. In the Configure step uncheck Check Validation.
3. In the Enable When section select the page your form is on using Page URL contains or equals /your-page-with-form/
4. For Fire On rule I’m using the CSS class of Contact Form 7 forms: wpcf7-form
5. Save your trigger.

trigger

Now let’s create the form tag:

1. Name your form tag.
2. Select Google Analytics and your analytics type.
3. In the Configure Tag section paste your GA ID (or use constant variable) and specify the event category and action.
4. Select the trigger from the previous step in the Fire On section.
5. Save your tag.

form-tag

At this point you should be ready to go. Click Publish – Preview to enter debug mode, open your website and do a test transaction. You should see the proper gtm.formSubmit event executed and your tag being fired:

formsubmit

Good luck!

P.S. Got a Google Analytics question? Send it to me and I’ll try to answer it on the blog.